
Our #ProjectLakeLife Renovation - The Staircase Dilemma
Welcome to our week 2 check-in. When we bought this house, all of our friends and family kept asking “have you started on the renovation?” Does everyone out there believe that real life is the same as HGTV life? Things move much more slowly in real life … and they should! I only want to do this renovation once, so it’s important to get it right the first time. Jumping into a project without taking the proper time to really get to know a space and how it functions, is asking for trouble. We also really need time to investigate a bunch of different options in terms of space planning and materials selections. I spent the first two months playing with Chief Architect, our 3D rendering software, to create hundreds of different versions of what I could do to the house. When we meet with clients, we show them 2 or 3 different options for how to redesign a space, but behind the scenes, we have done many more versions, several of which end up in the virtual recycle bin. We make it look easy, but there’s a lot of time, energy and creative bursts that go into finalizing a renovation plan.
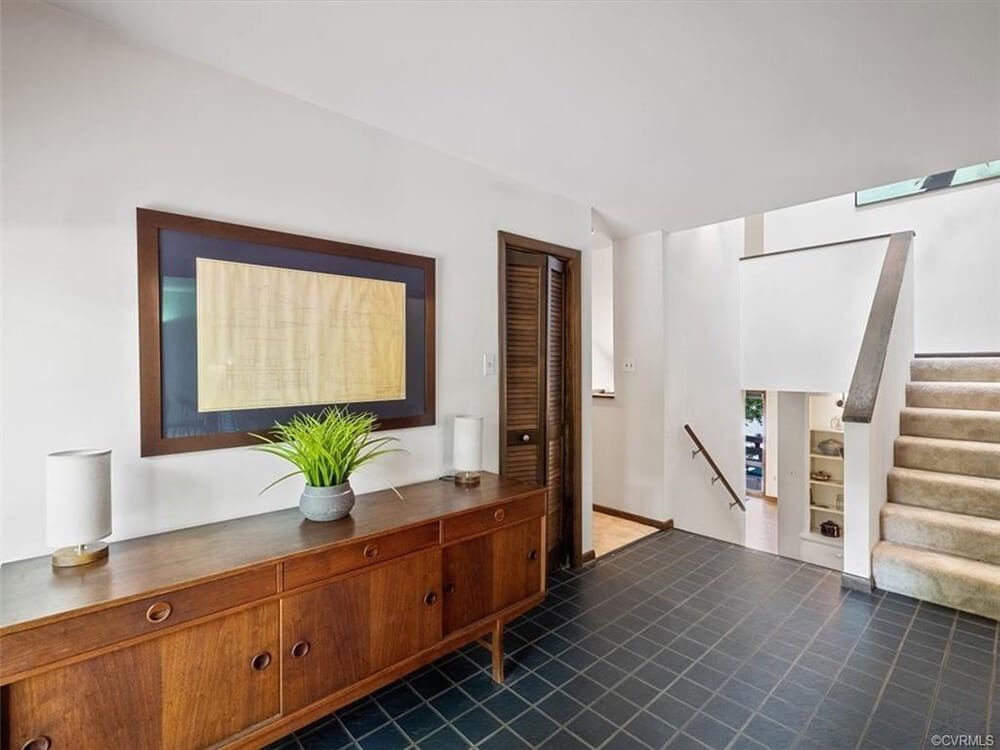
So let’s start at the beginning … or the foyer. As I explained before, it’s a split level house and when you enter the foyer, the focal point is a heavily drywalled staircase. Here is a photo of the foyer as the homeowners before us had it furnished.
For those of you who can understand blueprints, here is a better idea of how this area is laid out.

What’s cropped out of this blueprint image is the kitchen which lies behind the stairwell on the lower level. You can’t see the kitchen or much of the lower level from the foyer and stairwell and that’s one of the first things that we wanted to change. Originally when you walked down the stairs to the lower level, you were met by a wall of cabinetry that formed a hallway back to the tucked away formal dining room.

So why is this such a big deal? This house is a bit of a mullet - business in the front, party in the back! When we first toured this house when it went on the market, I was immediately sold when we walked down those stairs and rounded the corner to see the kitchen behind that wall. Was it because it was some amazing beautiful kitchen? Hardly … it hasn’t been updated in decades and it’s at the top of my renovation list. It’s what lies beyond the kitchen that was the real draw.

That’s 12’ of glass along the back of the kitchen with the gorgeous lake view outside those windows!
So finally we get to knock something down! Or rather, our hard working crew from Wateredge Construction, got to knock something down. But I’m hoping to get in on some demo action with a sledge hammer during the next demo round.
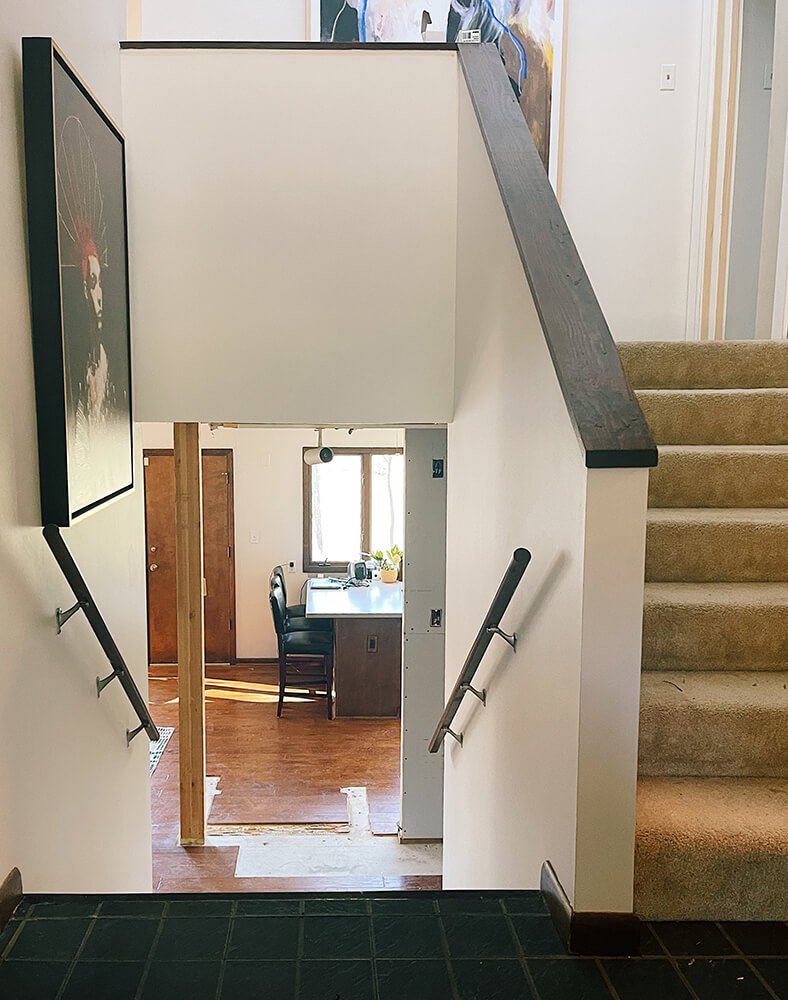
We love how open this makes the whole area feel. It brings light into the stairwell and foyer and immediately draws you back to the great lake views. And don’t worry, the ugly solid wood door on the back of the house is also on the chopping block..
Now the question is what do we do with the drywall curtain walls with the lovely old oak wall caps? My husband actually likes how all of the openings relate to each other and create some architectural interest. But, sometimes I wonder if he’s not just trying to avoid another costly project on our already long list. We considered opening up the drywall and doing a cable rail system. We did this in a downtown loft condo renovation that we completed a few years ago. To see more of that project, you can click on the photo below.

Click HERE to see the rest of this project in our portfolio.
In another recent midcentury modern project, I designed some really great stairwell panels inspired by the brutalist art sculpture associated with this era. Local metal artisans from Small Axe Forge fabricated and installed these panels for us. The original bent wood railings were installed very low (people must have been really short in the 50s). We wanted to keep those railings, so we installed new steel posts and raised the railings to a more acceptable height. But we also needed to protect the small ones (human and furry) from falling through the gap to the basement level below. As a side note, their 24 year old dog, and yes I said 24 and that is not a typo, did actually fall through the original gap twice and managed to survive. She was a tough little chihuahua! Here is the before photo of that staircase.

I love the floating wood stairs, but they aren’t an option for us because the steps to the basement run below our staircase. So just ignore that awesomeness and concentrate on the railings. Here is what we designed for them.

Aren’t these panels gorgeous!?! I love how Byron from Small Axe Forge, burnished that gold finish into the middle of those nail flowers.
I’m not saying that these are the ONLY two options for that railing because you can fall down a Pinterest rabbit hole for days looking at stair railings. But between these two looks, which is your favorite? The cable railing has been done (a LOT), but I still appreciate the simplicity of that look. But the artistry of the brutalist inspired panels is just so unique. But of course, “unique” is more expensive than “simple” and both are more expensive than Jeff’s “leave it alone” plan.
I would love your thoughts, so feel free to share your comments below. Time to go relax by the lake (actually not happening because it’s cold out there!). Hope you’re all staying warm this blustery January day.